MSX Diagnostics
1. Running the software
MSX Diagnostics is available in almost all MSX existing formats, like ROM cartridge, floppy and tape as physical formats, and in several digital formats, enabling people to make their own preferred physical copy or run it in emulators or loading devices, such as flashcards or Gotek devices.
The program may take a few seconds to perform this first check and depending on the RAM installed in your system it may take up to 5 seconds. This preliminary test and feedback are also helpful in ensuring that the MSX is booting up even without a monitor connected.
1.1. Running from cartridge
Like all other MSX software in cartridge format, just turn off your computer, insert the cartridge and turn on again. The program will start automatically. Do not remove or insert the cartridge while the computer is turned on.
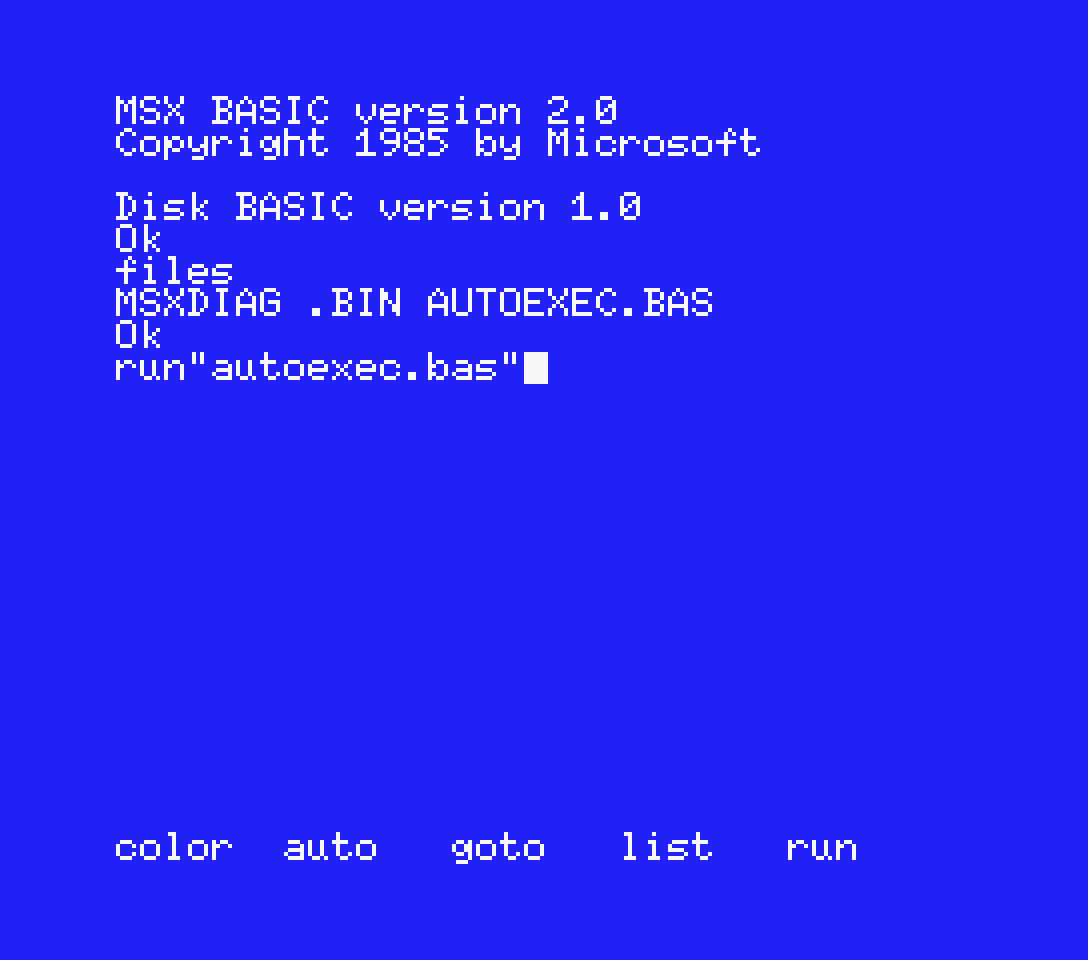
1.2. Running from floppy disk
To run the program from floppy disk (or from a disk image), insert the disk and turn on the computer. If you put it in the A: drive, it will run AUTOEXEC.BAS and start automatically. If you inserted the disk while the computer was turned on, just type RUN"AUTOEXEC.BAS" then press ENTER.
To run the program from a drive other than A:, just type BLOAD"B:MSXDIAG.BIN",R then press ENTER. Replace B: for the drive letter where you inserted the disk.
1.3. Running from tape
To run the program from a tape (or tape image) or audio file like WAV, just type RUN"CAS:" then press ENTER. Press PLAY in your cassette player or play the audio file. The 1200 bauds version will take around 3:53 minutes to load, and the 2400 bauds version around 2:10 minutes.
Regardless of the version you are loading, floppy or tape, you will hear 3 "beeps" and see the CAPS led flashing once the program finishes loading.
2. The main menu
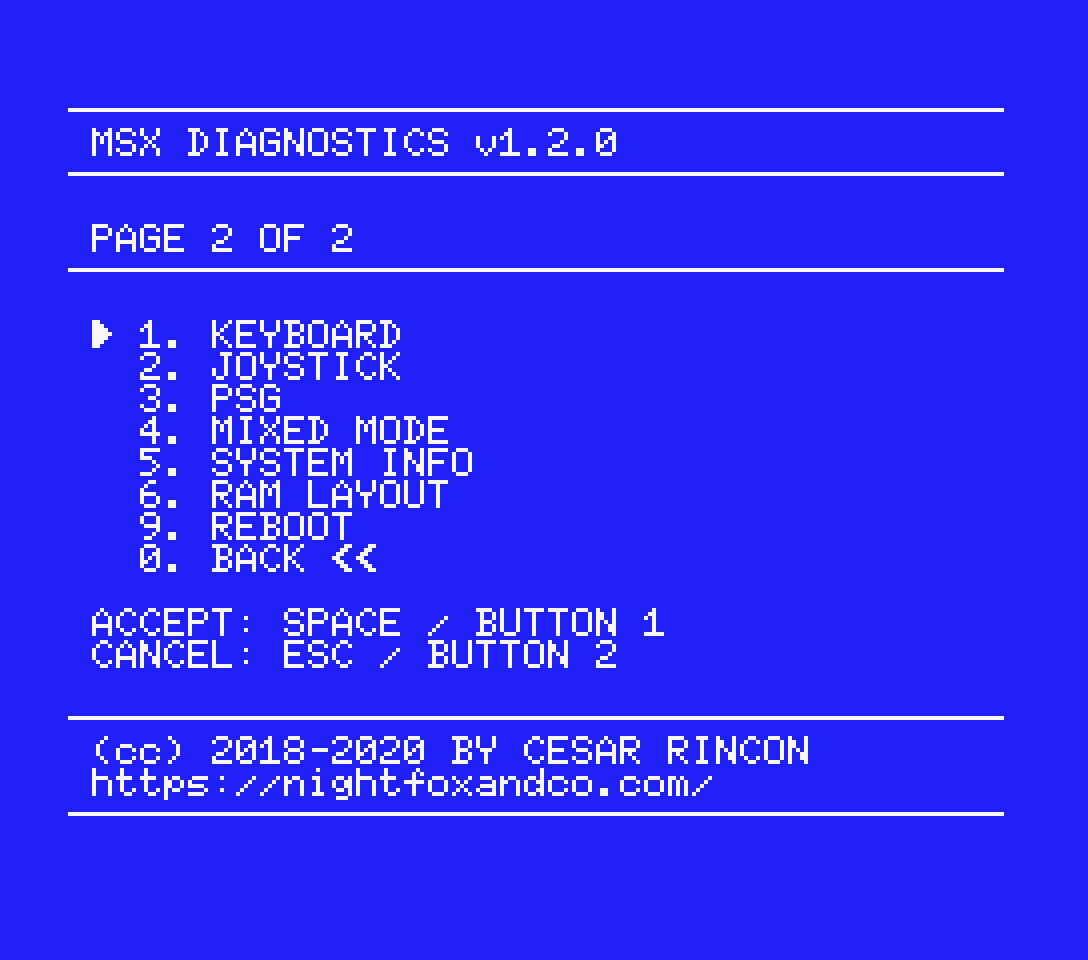
After the boot screen, the program will display the main menu. This menu has 2 pages, showing all available tests and options.
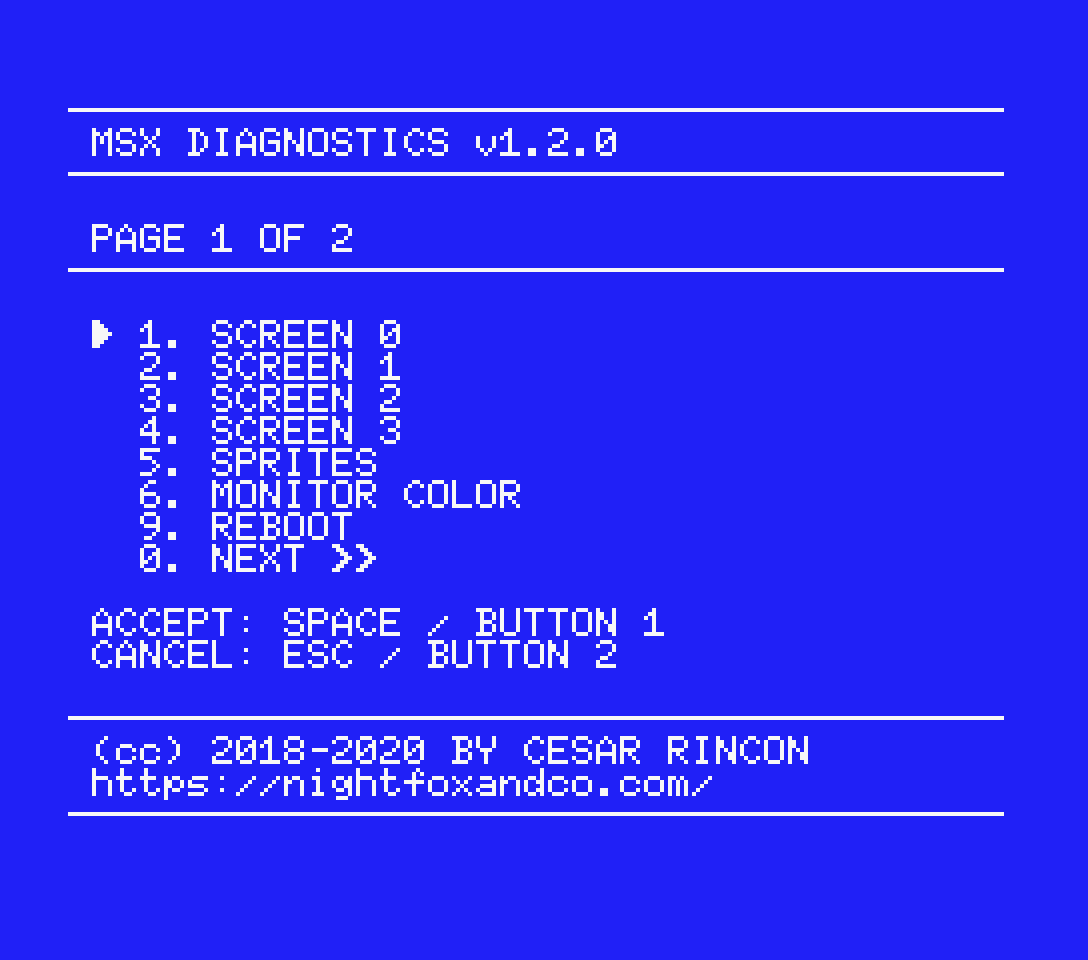
You can move through the options by pressing UP/DOWN on the arrow keys or the joystick. To run the selected option, simply press the SPACE key or the joystick* BUTTON 1 (Accept). You can also run a specific option directly by pressing the assigned number key. To change the menu page, use option "0" on both pages or just press LEFT/RIGHT on the cursor keys or the joystick.
To exit a test or return from an instruction page, press ESC key or BUTTON 2 on the joystick* (Cancel).
* Works only with the joystick connected in PORT 1.
3. Options in the page 1
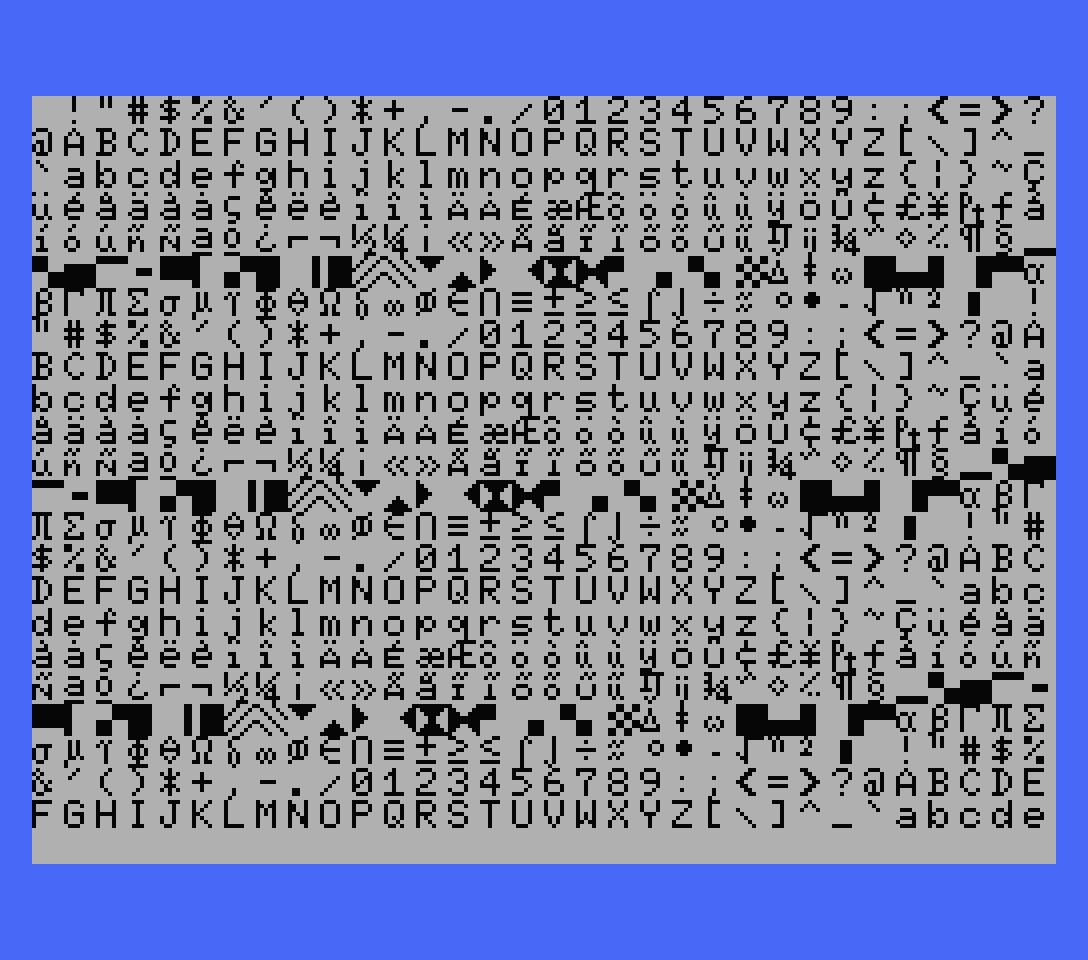
3.1. SCREEN 0 test
This test checks the VDP in the SCREEN 0 mode. The screen will fill with all printable characters. Check for any corrupted character to make sure the VDP and VRAM work fine in this mode.
By pressing RIGHT/LEFT on the arrow keys or the joystick you can change the foreground colour, and by pressing UP/DOWN you can change the background colour. Use SPACE key or joystick BUTTON 1 to restore the default colours. Use ESC key or joystick BUTTON 2 to exit the test.

3.2. SCREEN 1 test
This is almost the same test as for SCREEN 0 mode, but for SCREEN 1 mode. The screen will fill with all printable characters. Check for any corrupted character to make sure the VDP and VRAM work fine in this mode.
By pressing RIGHT/LEFT on the arrow keys or the joystick you can change the foreground colour, and by pressing UP/DOWN you can change the background colour. Use SPACE key or joystick BUTTON 1 to change the border colour. Use ESC key or joystick BUTTON 2 to exit the test.
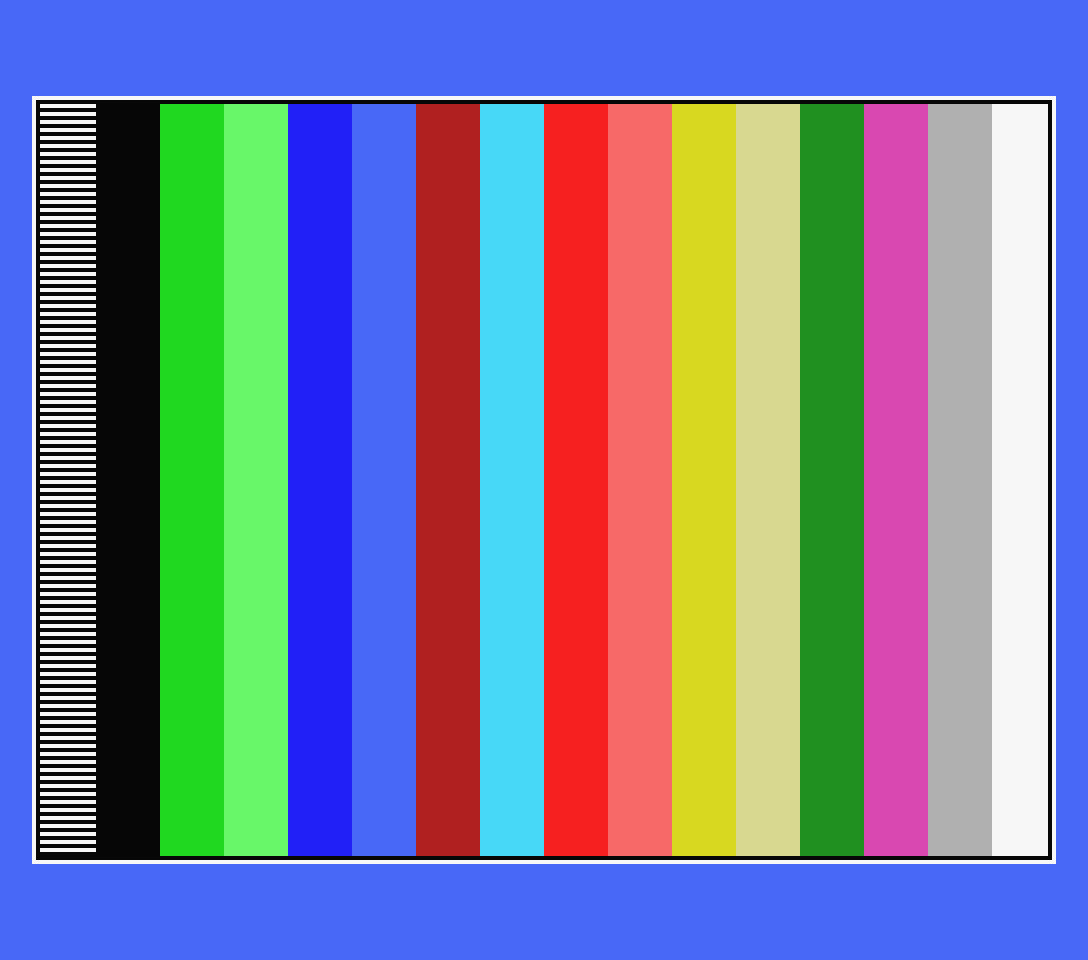
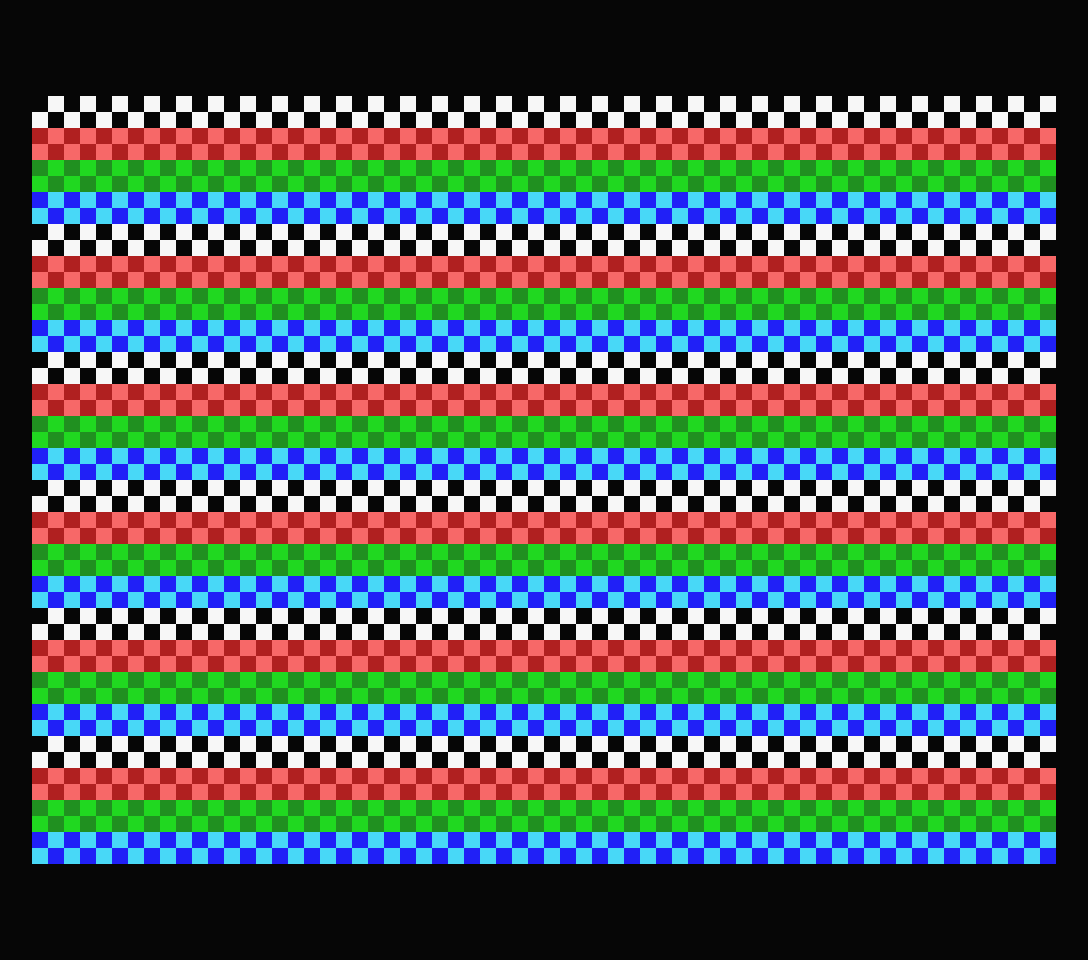
3.3. SCREEN 2 test
Like the previous test, this one will check the VDP in the SCREEN 2 mode. This test will display 4 different images: A pattern with white squares, a pattern with black squares, colours bars and a sample graphic. Check if all images are displayed correctly and without any artefact. You can use the patterns to adjust the geometry of your monitor, centre the screen or adjust the brightness, contrast, etc.
By pressing RIGHT/LEFT on the arrow keys or the joystick you can change the image displayed and by pressing UP/DOWN you can change the border colour. Use ESC key or joystick BUTTON 2 to exit the test.
3.4. SCREEN 3 test
This test will check the VDP for the SCREEN 3 mode and the special features of this mode. This test will display 7 different multi-coloured patterns. Check if every pattern is displayed correctly and without any artefact.
By pressing RIGHT/LEFT on the arrow keys or the joystick you can change the pattern displayed and by pressing UP/DOWN you can change the border colour. Use ESC key or joystick BUTTON 2 to exit the test.
3.5. SPRITES test
This test puts the screen in mode 2 and shows the 32 available sprites with different attributes, such as colour and position. The sprites use the same shape to make it easy to determine if any of them have a problem.
At the start of the test all sprites will be placed in a grid. Check if all sprites have the same shape and if they are aligned correctly. One of the 15 colours of the MSX1 palette, except black, has been assigned to each sprite on the screen.
Pressing SPACE key or joystick BUTTON 1 will start the sprites bouncing movement. Press again to stop them. You can reset the sprites positions by pressing UP on the arrow keys or the joystick. Press ESC key or joystick BUTTON 2 to exit the test.
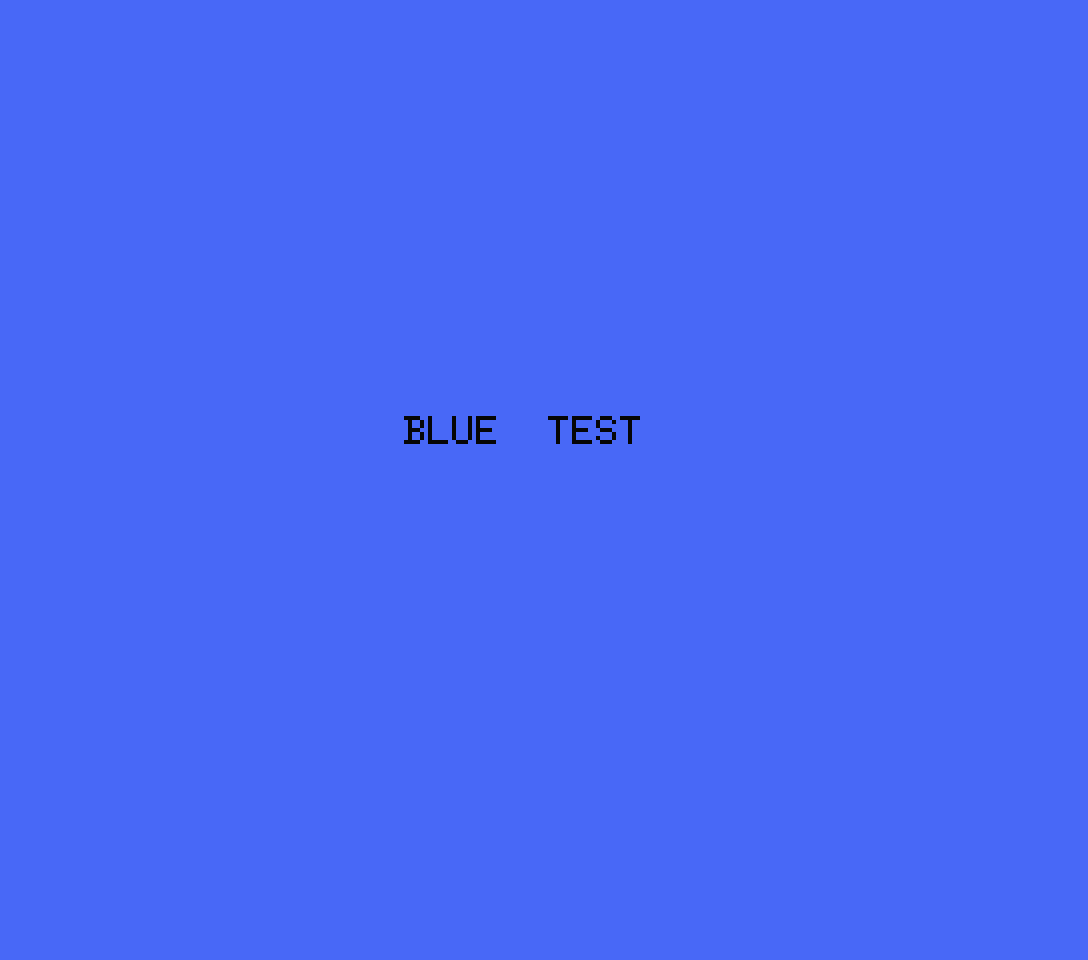
3.6. MONITOR COLOR test
This test fills the screen with a solid colour to check the colour quality or adjust the video output signal. You can choose from WHITE, BLACK, RED, GREEN and BLUE colours and a LOOPING test with the 15 available colours of the MSX1 palette. A text with the colour name will appear briefly when the colour it’s selected.
Press RIGHT/LEFT on the arrow keys or the joystick to change the colour displayed. In the looping test, press UP/DOWN on the arrow keys or the joystick to change the speed. You will hear a "beep" if the speed has changed. Press ESC key or joystick BUTTON 2 to exit the test.
4. Options in the page 2
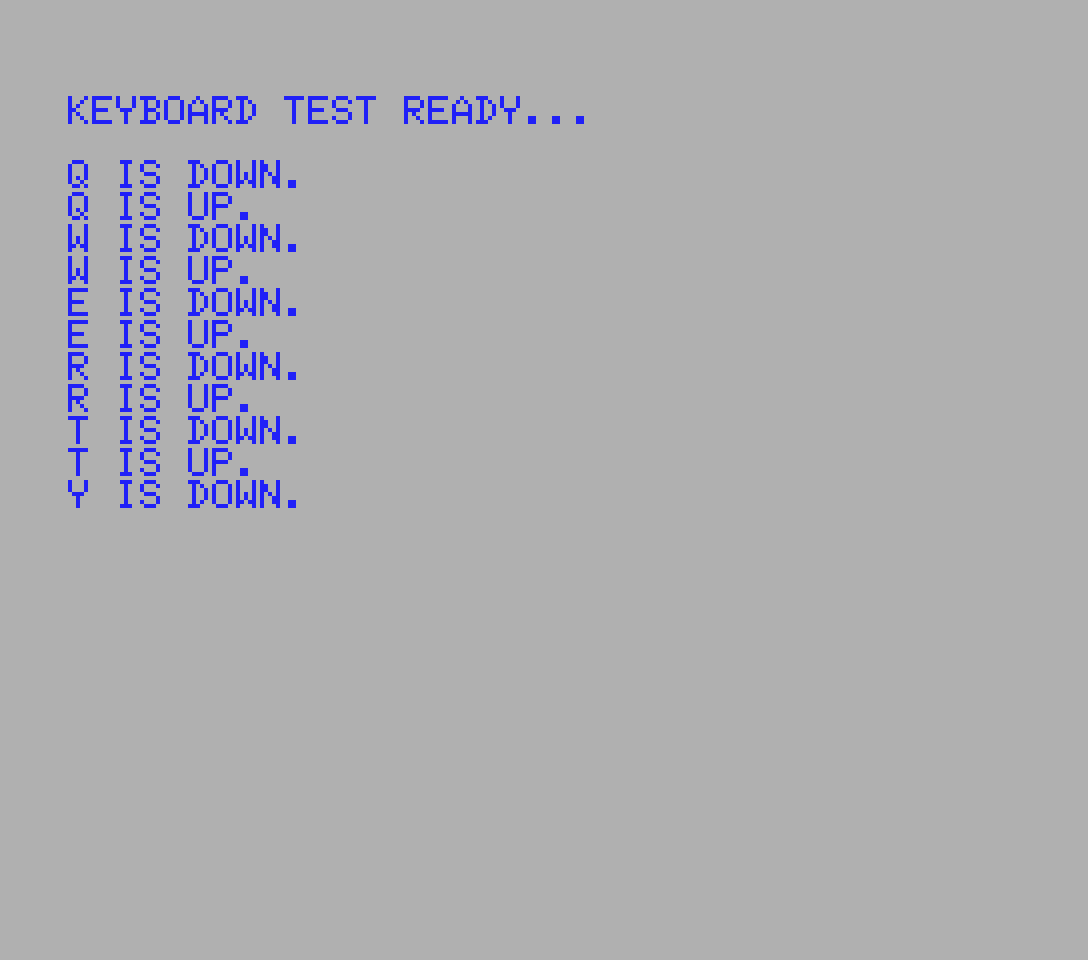
4.1. KEYBOARD test
This test enables you to check all the keys of the MSX keyboard. Pressing a key will display a confirmation text and the key character (if available), change the foreground and background colour of the screen and make a beep sound. When you release the key, another confirmation text will appear, the screen colours will return to the original ones and another beep sound will be emitted. The colour change and beep sound allow you to test all the keys without having to look at the screen.
Press LEFT SHIFT + ESC keys or joystick BUTTON 2 to exit the test.
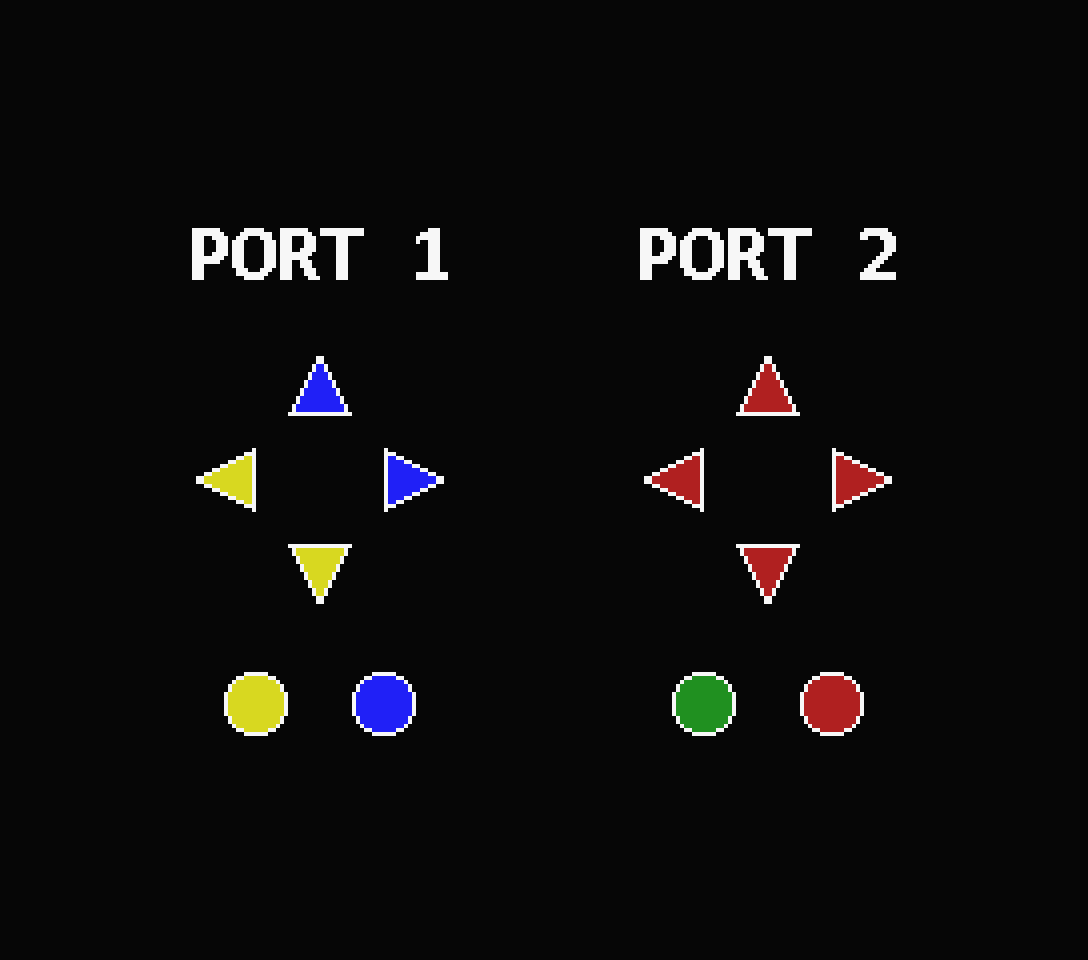
4.2. JOYSTICK test
You can check any joystick or gamepad connected to both port 1 or 2.
When you move the joystick or the gamepad in any direction or press any button, it will be highlighted in the graphic on the screen, indicating that it works fine. If a specific direction or button is not highlighted it means that the joystick/gamepad has a problem. Please note that this test will also show an error if the port itself has a problem (broken solders, etc.).
Press ESC key or joystick UP + BUTTON 1 to exit the test.
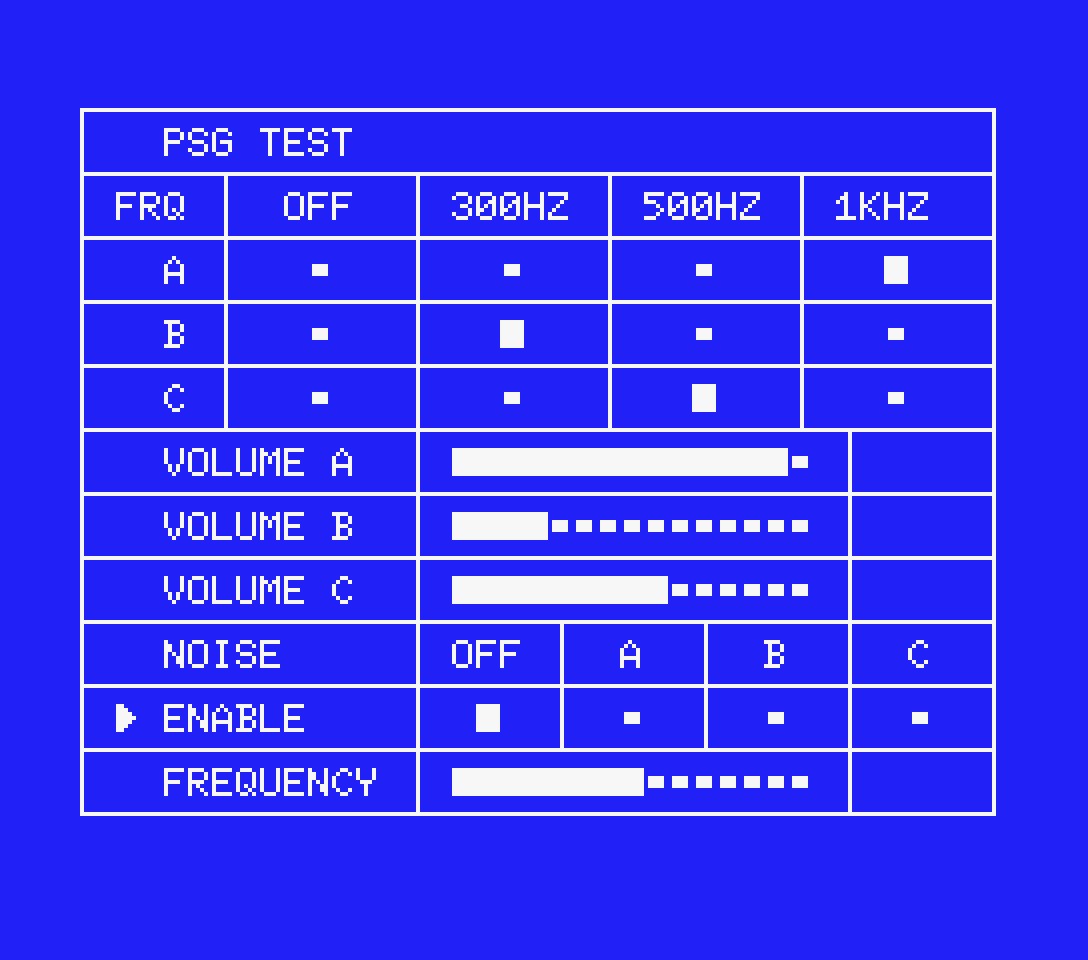
4.3. PSG test
This is one of the most powerful tests included. With this test you can check in depth the Programmable Sound Generator (PSG) of the MSX.
You can assign to any of the 3 available channels of the PSG a tone with frequencies of 300Hz, 500Hz or 1KHz, change the volume level of each channel or set any channel in noise generation mode, with the possibility of also configuring the frequency of the noise.
Press UP/DOWN on the arrow keys or the joystick to select an option and RIGHT/LEFT to change the value.
Press ESC key or joystick BUTTON 2 to exit the test. Any sound will stop upon exiting the test.
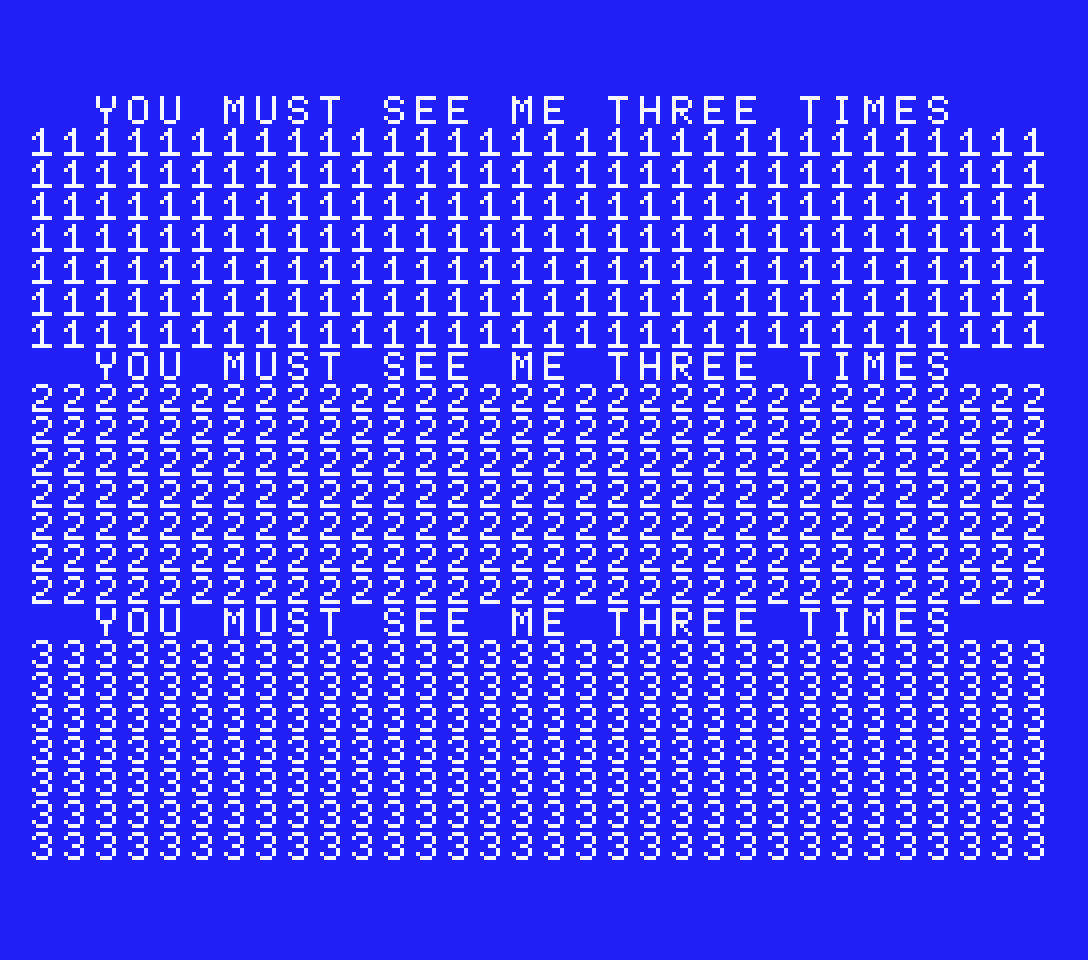
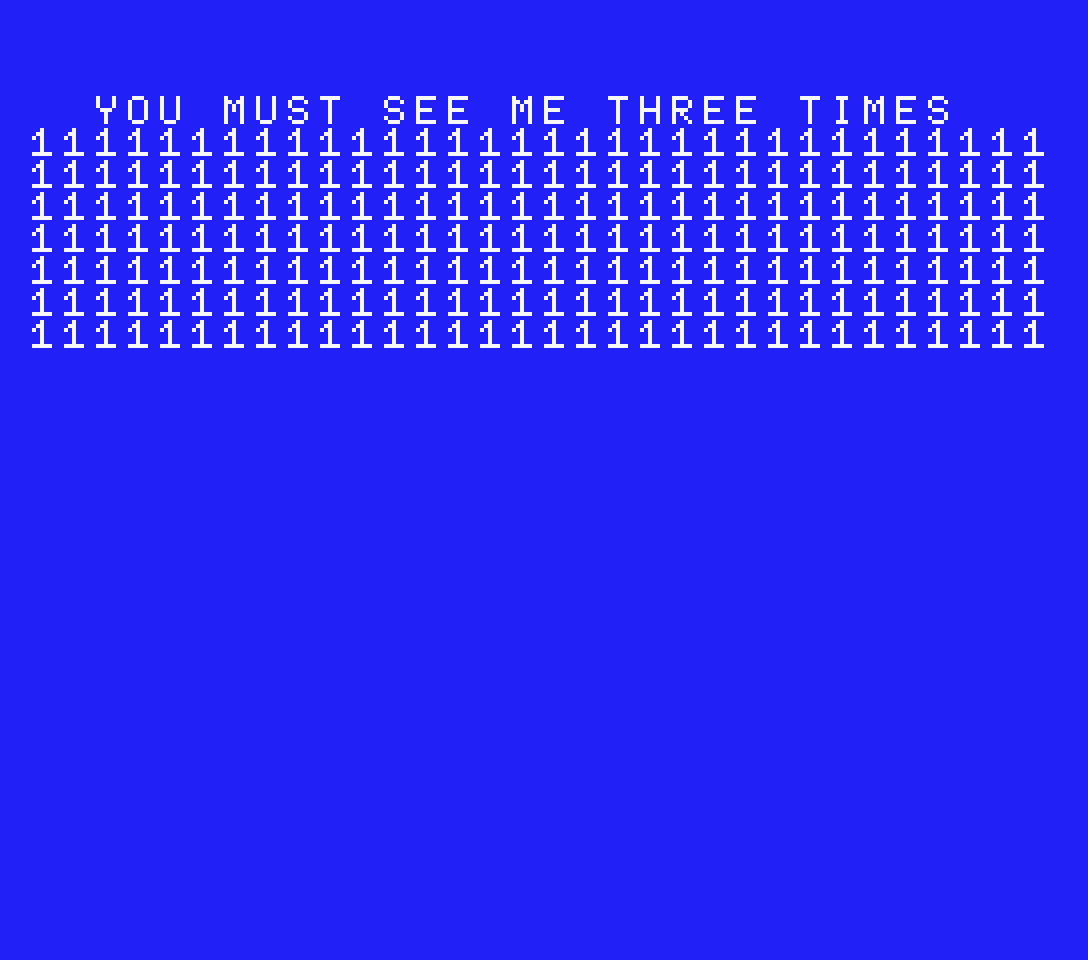
4.4. MIXED MODE test
This test checks if the VDP of your MSX is fully compatible with the undocumented mode by Texas Instruments. (More Info).
Some MSX models have a "clone" of the official VDP and may not support this undocumented feature. One of the most know models with this issue it’s the HX-20 from TOSHIBA.
Just run the test and check if the screen is full of text. If only the upper part fills up, the VDP it’s not compatible.
Press ESC key or joystick BUTTON 2 to exit de test.
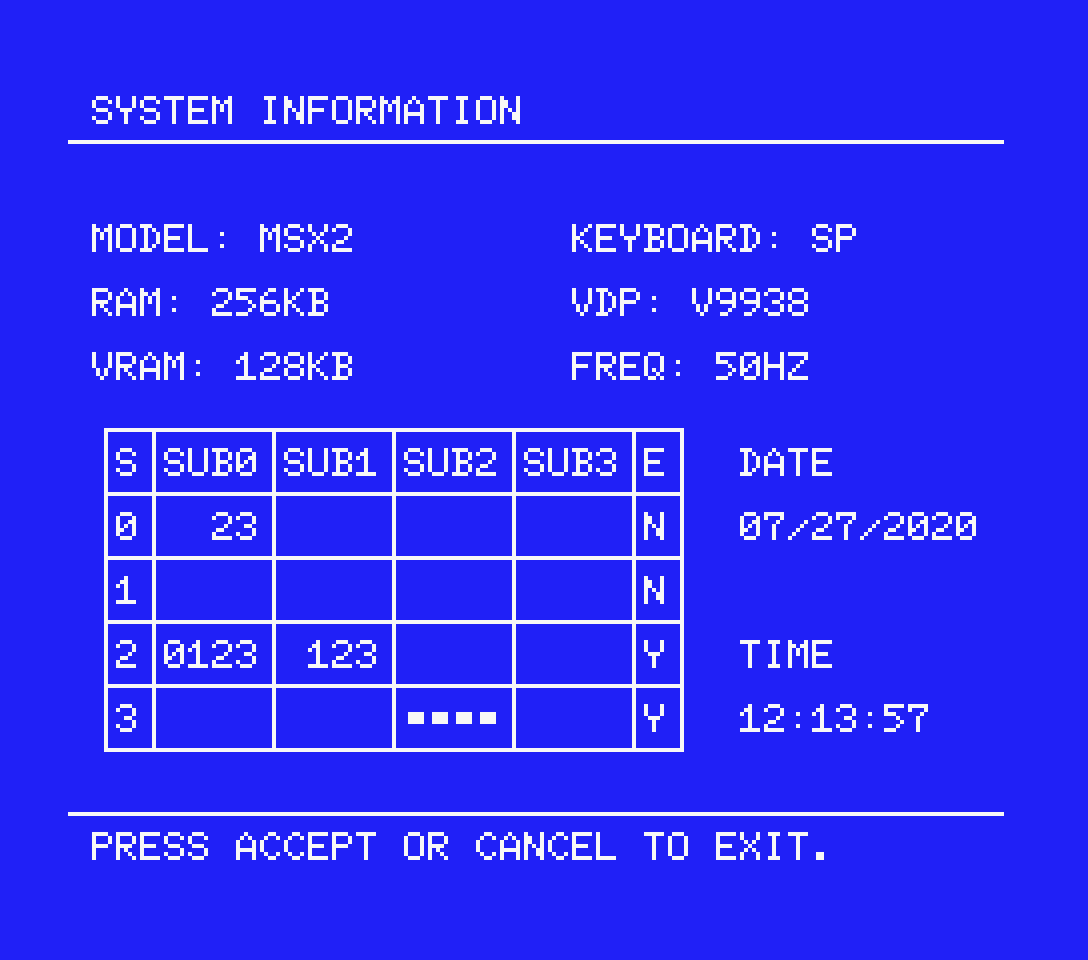
4.5. SYSTEM INFORMATION
This option generates a report with basic information about your MSX, such the MSX generation, the keyboard language, the amount of RAM and VRAM detected, the VDP installed in your system and the current refresh rate, also indicating with a warning sign if it is not running at the original frequency.
In MSX2 and later models with RTC, it will display the current date & time. If not properly displayed, check if your settings are correct.
This report also shows a table with the current detected RAM layout in SLOTS/SUBSLOTS and if they are expanded or not. It also indicates which page the RAM is placed on (numbers) or if it’s MAPPED (squares).
Press SPACE/ESC key or any joystick BUTTON to exit the report.
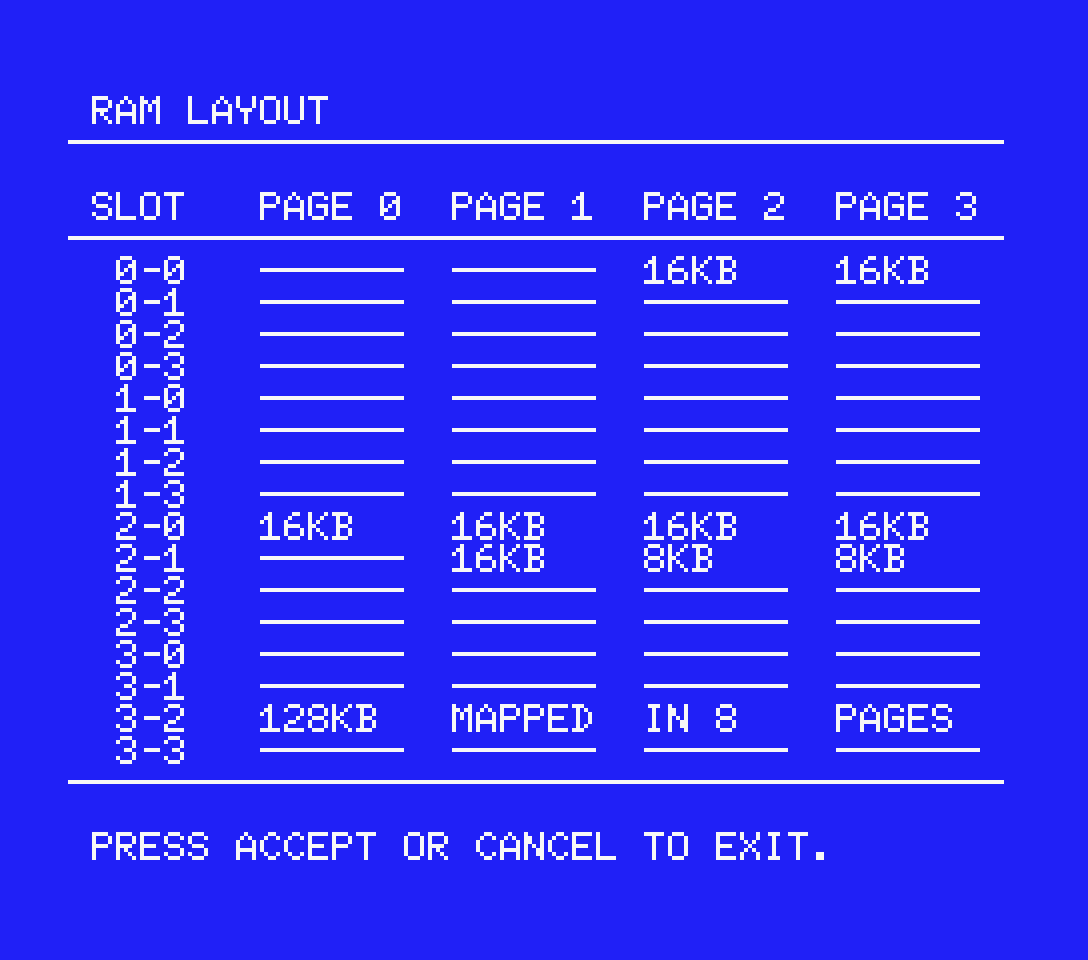
4.6. RAM LAYOUT
This option generates a more accurate report of the RAM installed and detected in your MSX computer. This report indicates which slot, sub-slot and page is the RAM placed in and the amount. If the RAM is MAPPED, the report also indicates the number of pages detected.
This report is useful when checking to see if a RAM upgrade is working or if an external RAM expansion is detected.
Press SPACE/ESC key or any joystick BUTTON to exit the report.
4.7. REBOOT
On both page 1 and page 2 of the main menu, you will find the REBOOT option. When you run this option, your computer will perform a warm reset, erasing the program from the RAM. If you’re using the cartridge version, the program will start again automatically.

5. Known issues